For the complete documentation index, see llms.txt. Markdown versions of all docs pages are available by appending .md to any docs URL.
Auth0 setup
Configure Auth0, create a test user, and configure the kgateway Backend and TLS.
Set up an Auth0 account, register kgateway as an OAuth2 client, and give the gateway a network path to reach Auth0. Every Auth0 guide in this section starts here.
When you finish, you choose an authentication flow:
- Authorization code flow for browser traffic.
- Access token validation for API clients that already hold a token.
Before you begin
-
Follow the Get started guide to install kgateway.
-
Follow the Sample app guide to create a gateway proxy with an HTTP listener and deploy the httpbin sample app.
-
Get the external address of the gateway and save it in an environment variable.
export INGRESS_GW_ADDRESS=$(kubectl get svc -n kgateway-system http -o jsonpath="{.status.loadBalancer.ingress[0]['hostname','ip']}")
echo $INGRESS_GW_ADDRESS
-
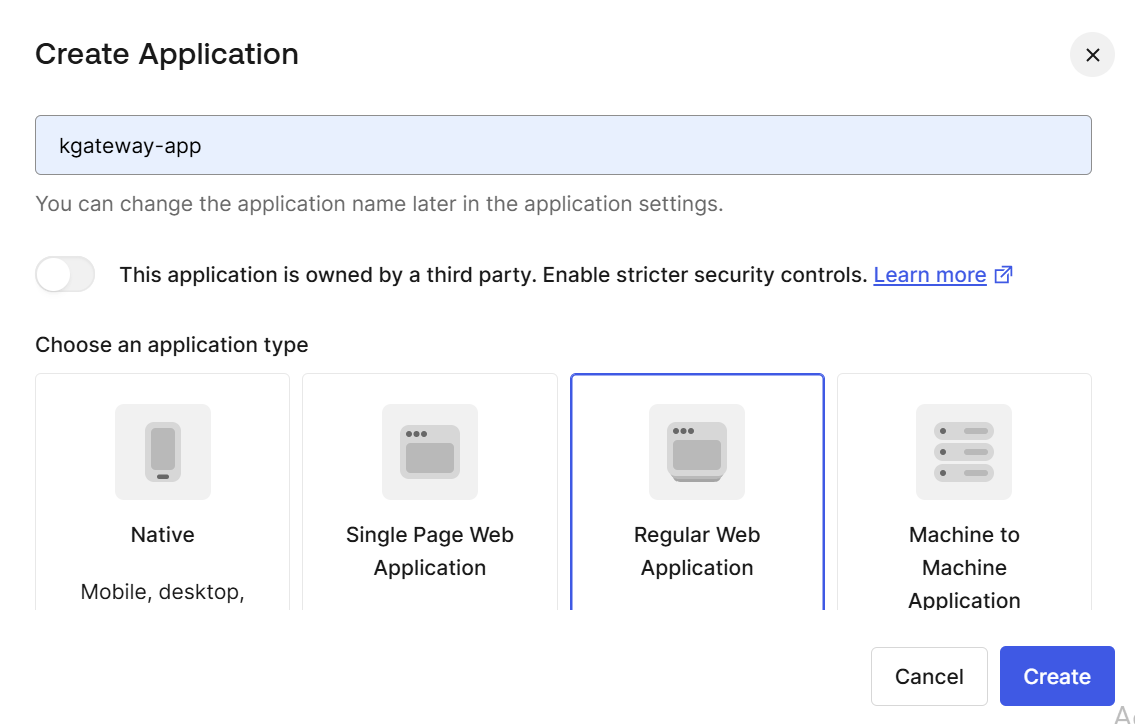
An Auth0 account with a configured Regular Web Application. At minimum, set the following on the Auth0 application:
Setting Value Application Type Regular Web Application Allowed Callback URLs https://www.example.com/oauth2/redirectAllowed Logout URLs https://www.example.comAllowed Web Origins https://www.example.comJWT Signature Algorithm RS256 OIDC Conformant Enabled The redirect URI path is
/oauth2/redirect, which is the default callback path that kgateway registers. You can override it withredirectURIin theGatewayExtensionif needed. -
A test user created in your Auth0 database connection.
The authorization code flow requires an HTTPS listener on your gateway. Kgateway sets the OAuth2 nonce and code verifier cookies with the Secure attribute, so browsers do not return them over plain HTTP and the callback fails CSRF validation. To add one, see HTTPS listener. The access token validation flow works over HTTP, because it does not use cookies.
Configure Auth0
Create an Auth0 application, configure the required settings, and add a test user.
Access the Auth0 Dashboard
-
Go to the Auth0 Dashboard.
-
Go to Applications > Applications.
-
Click your Regular Web Application.
Configure application settings
-
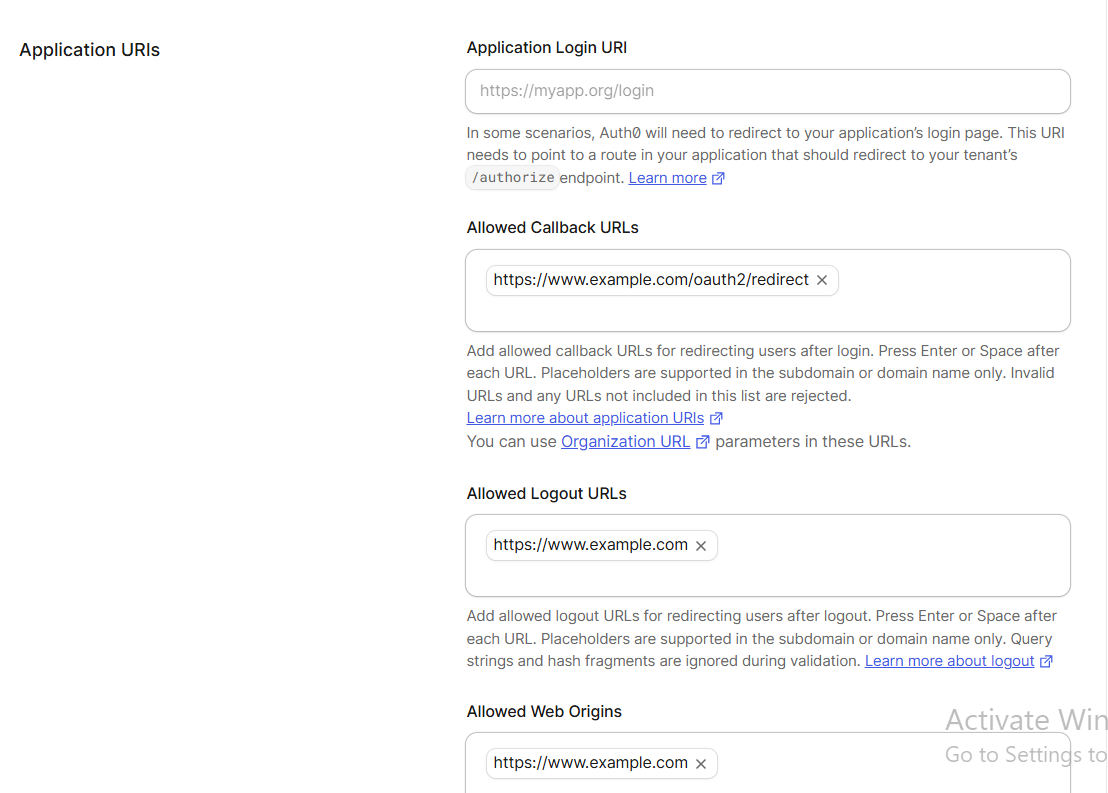
On the Settings tab, set the following fields.
- Allowed Callback URLs:
https://www.example.com/oauth2/redirect - Allowed Logout URLs:
https://www.example.com - Allowed Web Origins:
https://www.example.com
- Allowed Callback URLs:
-
Still on the Settings tab, copy the Client ID and the Client Secret. You need both for the
GatewayExtensionthat you create in the flow guides.Note
The Client Secret is shown only once after creation. If you lose it, you can regenerate it, but regenerating invalidates any existing tokens.
-
Scroll to Advanced Settings > OAuth and set the following fields.
- JsonWebToken Signature Algorithm:
RS256 - OIDC Conformant: Enabled
- Default Directory:
Username-Password-Authentication, so that the password grant uses the correct connection.
- JsonWebToken Signature Algorithm:
-
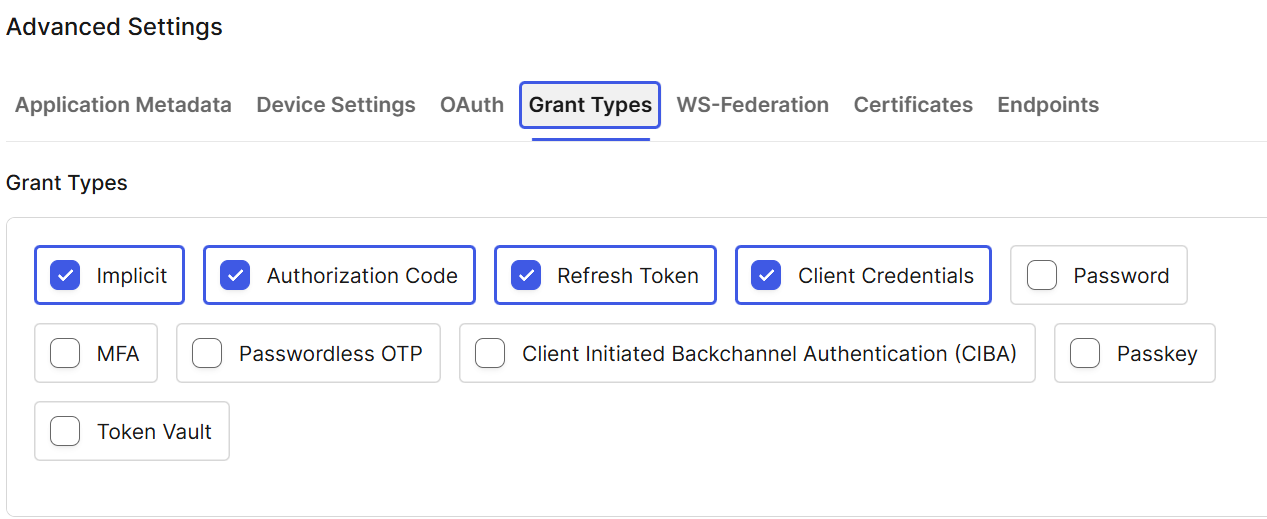
Go to Advanced Settings > Grant Types and select the grants that you need.
- Authorization Code is required for the authorization code flow.
- Password is required only for the access token validation flow, which uses the password grant to fetch a token for testing.
-
Click Save Changes.
Create an Auth0 API
Complete this step only if you plan to use the access token validation flow. The API Identifier is the audience that kgateway validates the aud claim against.
-
In the Auth0 Dashboard, go to Applications > APIs.
-
Click Create API.
-
Enter a Name, such as
kgateway-api, and an Identifier, such ashttps://my-api.example.com. -
Click Create.
-
Copy the Identifier. You use it as
YOUR_API_AUDIENCEin the access token validation guide.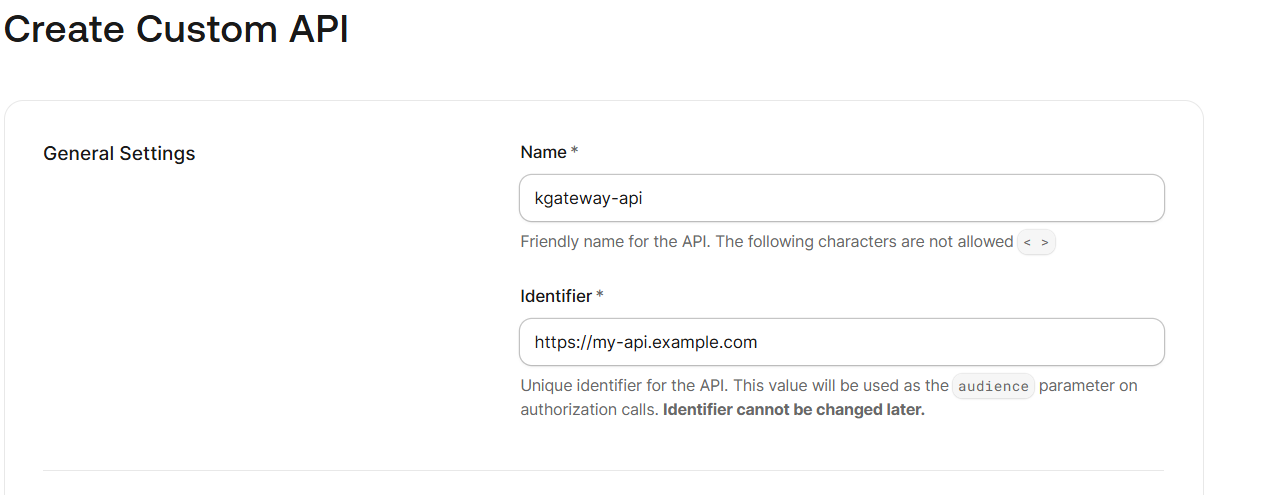
Note
If you already have an Auth0 API, use its Identifier instead of creating a new one.
Create a test user
-
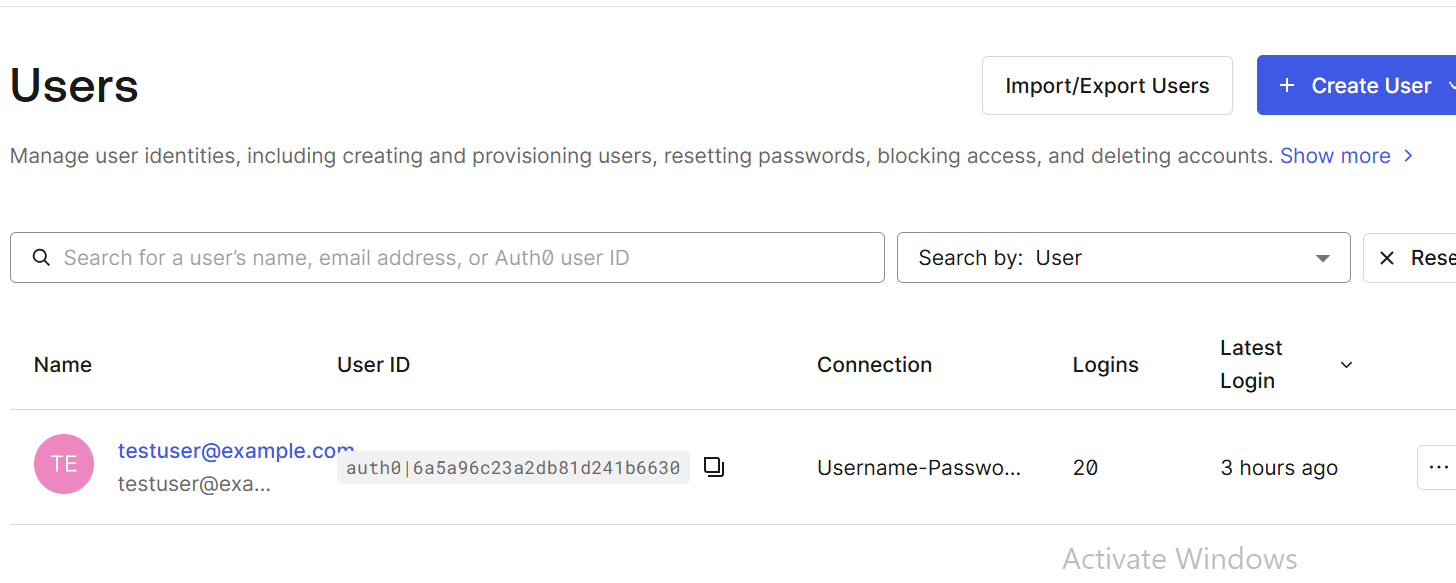
In the Auth0 Dashboard, go to User Management > Users.
-
Click Create User.
-
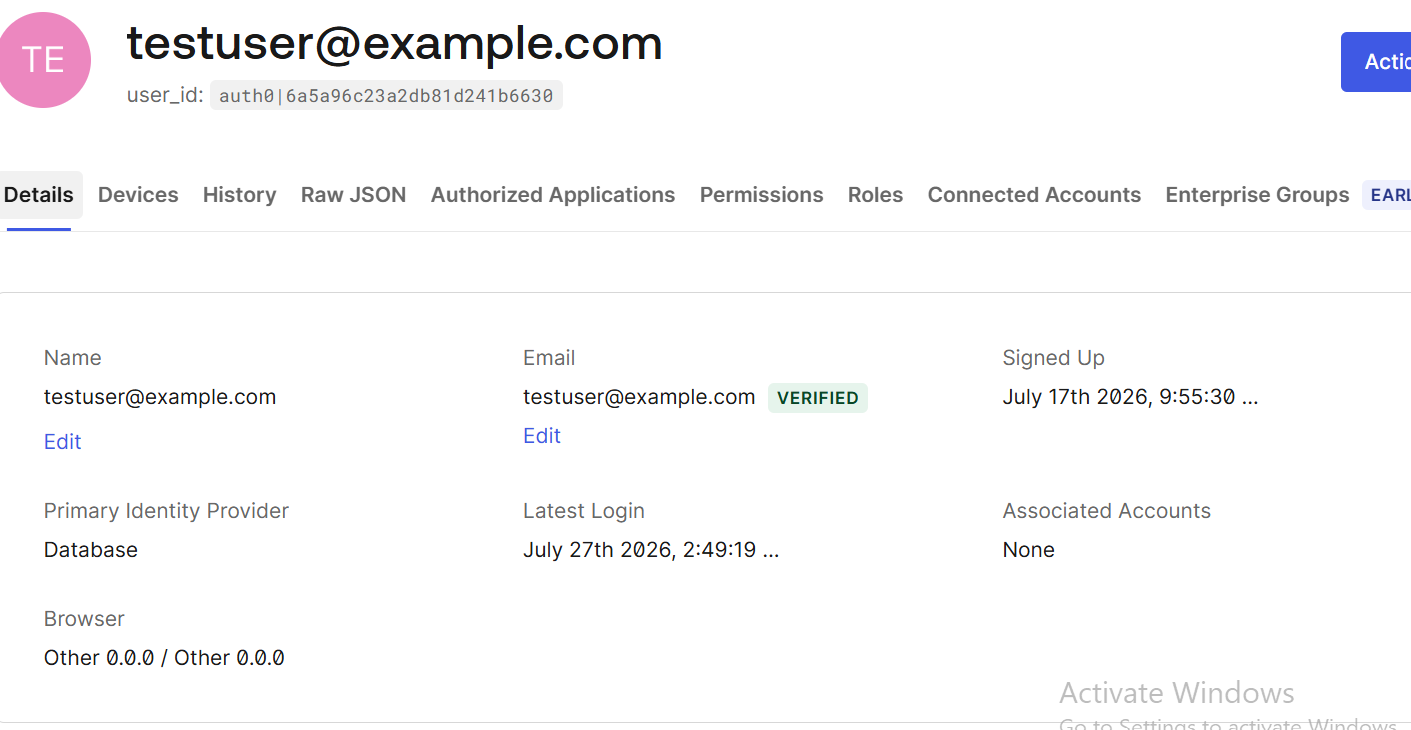
Enter the user details.
- Email:
[email protected] - Password: a password of your choice
- Connection:
Username-Password-Authentication
- Email:
-
Click Create, and verify that the user is created.
Note
The steps above create a test user for this guide only. For production, use a dedicated Auth0 tenant and follow the Auth0 production best practices.
Connect kgateway to Auth0
Both authentication flows need a network path from the gateway to Auth0. Create these two resources first, whichever flow you use.
Create a Backend for Auth0
Create a Backend resource that defines how kgateway reaches your Auth0 tenant. This Backend uses the Static type with the host and port configured for Auth0.
kubectl apply -f- <<EOF
apiVersion: gateway.kgateway.dev/v1alpha1
kind: Backend
metadata:
  name: auth0
  namespace: kgateway-system
spec:
  type: Static
  static:
    hosts:
    - host: YOUR_AUTH0_DOMAIN
      port: 443
EOF
Replace YOUR_AUTH0_DOMAIN with your Auth0 domain, such as dev-xxx.us.auth0.com. The port must be 443 because kgateway reaches Auth0 over HTTPS.
Note
This address is separate from the public Auth0 URL that you configure on the GatewayExtension in the next steps. The Backend is the network path that the gateway uses for token exchange and OIDC discovery, and it does not have to be reachable from the browser.
Configure TLS for the Auth0 Backend
Auth0 serves HTTPS with a certificate from a public CA, so the gateway can verify it against the system trust store. Create a BackendConfigPolicy that configures TLS for the Auth0 Backend.
kubectl apply -f- <<EOF
apiVersion: gateway.kgateway.dev/v1alpha1
kind: BackendConfigPolicy
metadata:
  name: auth0-tls
  namespace: kgateway-system
spec:
  targetRefs:
    - group: gateway.kgateway.dev
      kind: Backend
      name: auth0
  tls:
    sni: YOUR_AUTH0_DOMAIN
    wellKnownCACertificates: System
EOF
Replace YOUR_AUTH0_DOMAIN with your Auth0 domain, such as dev-xxx.us.auth0.com. The wellKnownCACertificates: System setting tells the gateway to use the system trusted CA certificates, which include the Certificate Authority that signed the Auth0 certificate.
Next steps
Auth0 is configured and the gateway can reach it. Now protect a route with the flow that matches how your clients arrive.
Cleanup
You can remove the resources that you created in this guide.-
Remove the resources from this page only after you have cleaned up whichever flow you configured.
kubectl delete BackendConfigPolicy auth0-tls -n kgateway-system kubectl delete Backend auth0 -n kgateway-system -
To remove Auth0, delete the Auth0 application from your Auth0 Dashboard.