For the complete documentation index, see llms.txt. Markdown versions of all docs pages are available by appending .md to any docs URL.
Okta setup
Set up an Okta account, register kgateway as an OAuth2 client, and give the gateway a network path to reach it.
Set up an Okta account, register kgateway as an OAuth2 client, and give the gateway a network path to reach Okta. Every Okta guide in this section starts here.
When you finish, you choose an authentication flow:
- Authorization code flow for browser traffic.
- Access token validation for API clients that already hold a token.
Before you begin
-
Follow the Get started guide to install kgateway.
-
Follow the Sample app guide to create a gateway proxy with an HTTP listener and deploy the httpbin sample app.
-
Get the external address of the gateway and save it in an environment variable.
export INGRESS_GW_ADDRESS=$(kubectl get svc -n kgateway-system http -o jsonpath="{.status.loadBalancer.ingress[0]['hostname','ip']}")
echo $INGRESS_GW_ADDRESS
-
An Okta account with a configured Web Application. At minimum, set the following on the Okta application:
Setting Value Application Type Web Sign-in redirect URIs https://www.example.com/oauth2/redirectSign-out redirect URIs https://www.example.comGrant types Authorization Code, Client Credentials The redirect URI path is
/oauth2/redirect, which is the default callback path that kgateway registers. You can override it withredirectURIin theGatewayExtensionif needed. -
A test user created in your Okta directory.
-
An access policy and rule configured on the default authorization server. Without this policy, the browser login fails with the message that the user is not allowed to access the app. You create this policy later in Configure the default authorization server.
Note
Client Credentials requires API Access Management, which is not enabled on every Okta org. If you plan to use the access token validation flow with a Client Credentials token, confirm that your org has API Access Management enabled before you begin.
Configure Okta
Create an Okta application, configure the required settings, and add a test user.
Create a Web Application
Kgateway is a server-side confidential client. It holds the client secret and performs the code exchange itself, so register it as a Web application rather than a Native or single-page application.
-
Log in to your Okta Admin Console, such as
https://YOUR_OKTA_DOMAIN-admin.okta.com, with your administrator credentials. -
Go to Applications > Applications, and click Create App Integration.
-
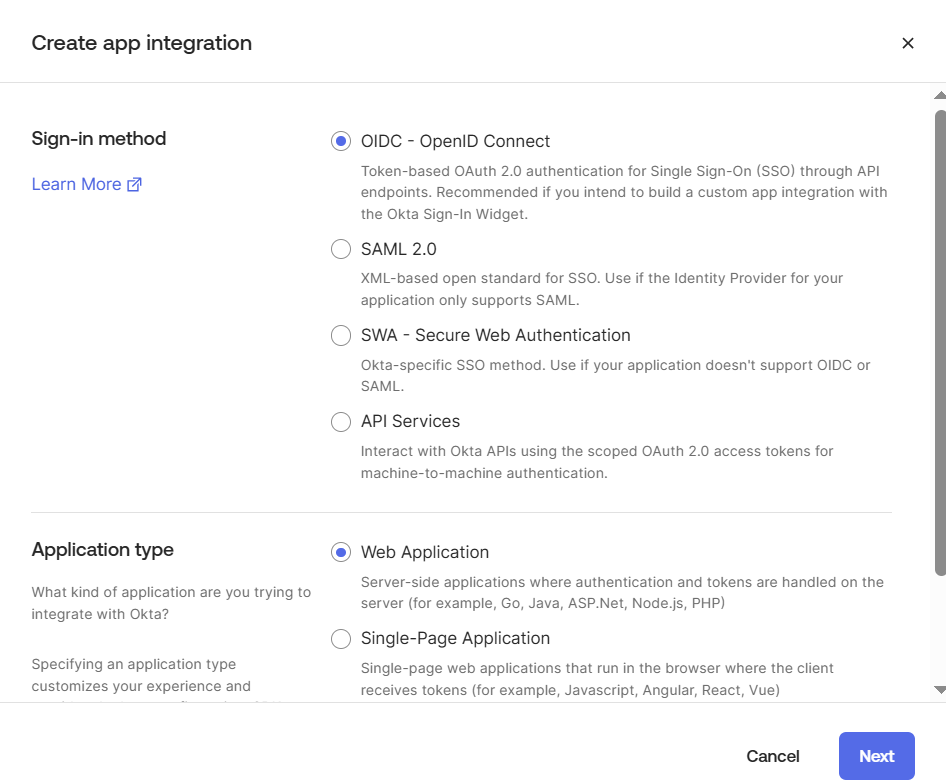
Select OIDC - OpenID Connect, select Web Application, and click Next.
-
In the General Settings tab, configure the application.
- App integration name:
kgateway-app - Grant type: Authorization Code. Also select Client Credentials if you plan to request tokens for the access token validation flow directly.
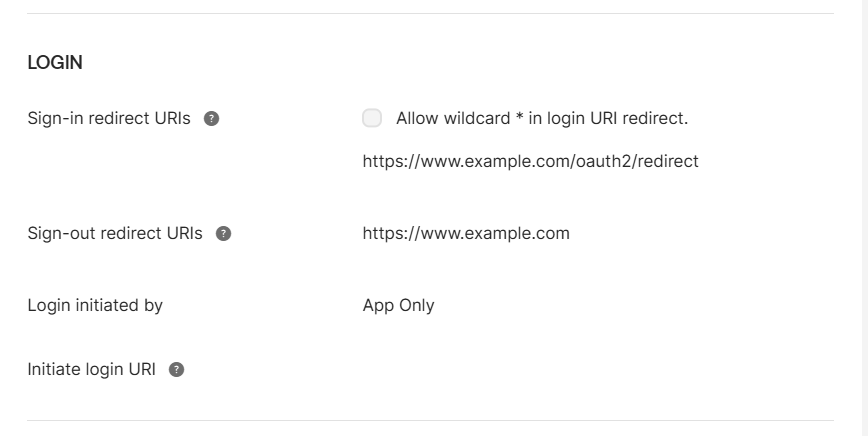
- Sign-in redirect URIs:
https://www.example.com/oauth2/redirect - Sign-out redirect URIs:
https://www.example.com - Assignments: Skip group assignment for now
- App integration name:
-
Click Save.
Copy the Client ID and Client Secret
-
On the application details page, find the Client Credentials section.
-
Copy the Client ID and the Client Secret. You need both for the
GatewayExtensionthat you create in the flow guides.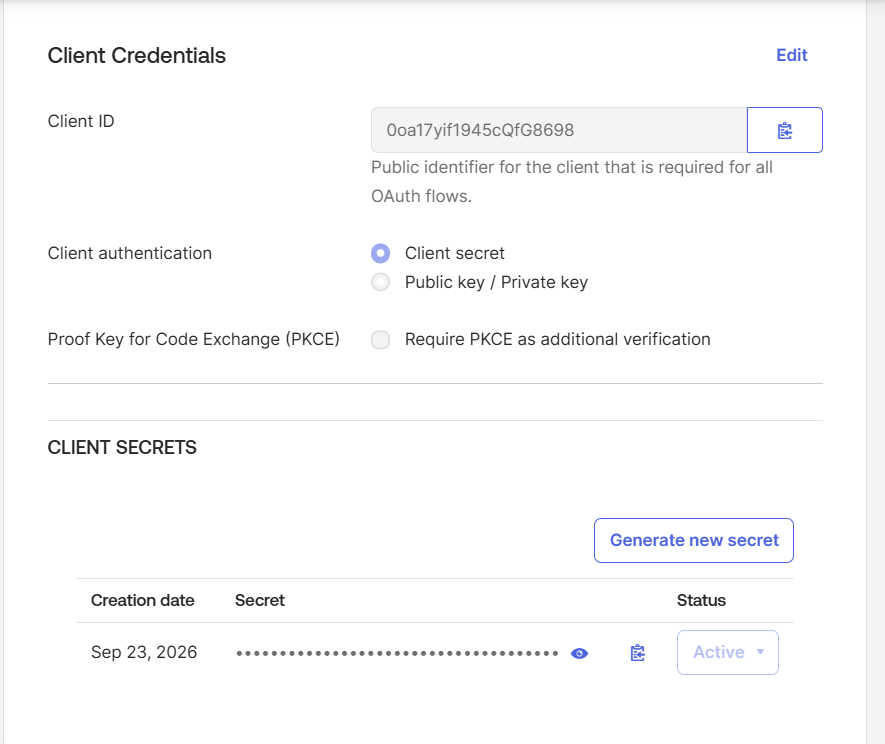
Note
The Client Secret is shown only once after creation. If you lose it, you can generate a new one, but generating a new one invalidates any existing tokens.
Create a test user
-
In the Okta Admin Console, go to Directory > People, and click Add person.
-
Enter the user details.
- First name:
Test - Last name:
User - Username and Primary email:
[email protected] - Activation: I will set password, then enter a password of your choice
- Clear User must change password on first login
- First name:
-
Click Save.
Configure the default authorization server
Okta provides two kinds of authorization server. The Org authorization server mints tokens for Okta’s APIs. Custom authorization servers mint tokens for your APIs. This guide uses the custom authorization server named default, at /oauth2/default. Only a custom authorization server lets you set the audience, define scopes, and control the token contents that the gateway validates. Okta says that Org authorization server tokens “aren’t intended for validation or use by your own apps or resource servers.” Their contents are also “subject to change at any time without notice.”
-
In the Okta Admin Console, go to Security > API, and open the Authorization Servers tab.
-
Click default, then go to the Access Policies tab.
-
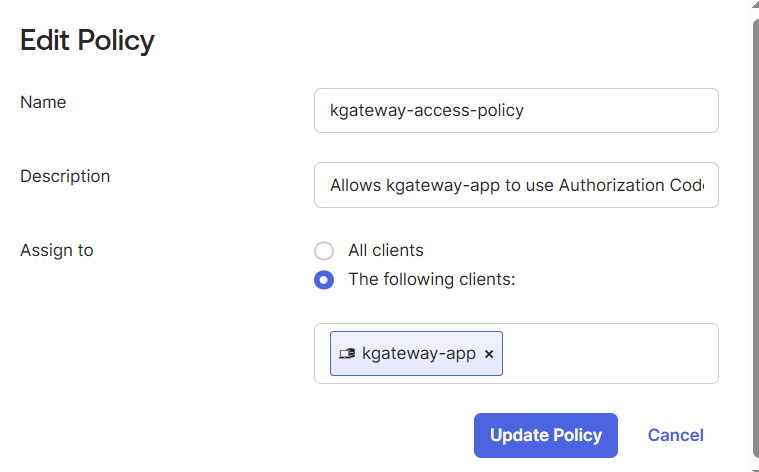
Click Add Policy, configure the policy, and click Create Policy.
- Name:
kgateway-access-policy - Assign to: The following clients, then select
kgateway-app
- Name:
-
On the new policy, click Add rule, configure the rule, and click Create Rule.
- Rule Name:
kgateway-default-rule - Grant type: Authorization Code. Also select Client Credentials if you plan to request tokens for the access token validation flow directly.
- User is: Any user assigned the app
- Scopes requested: Any scopes
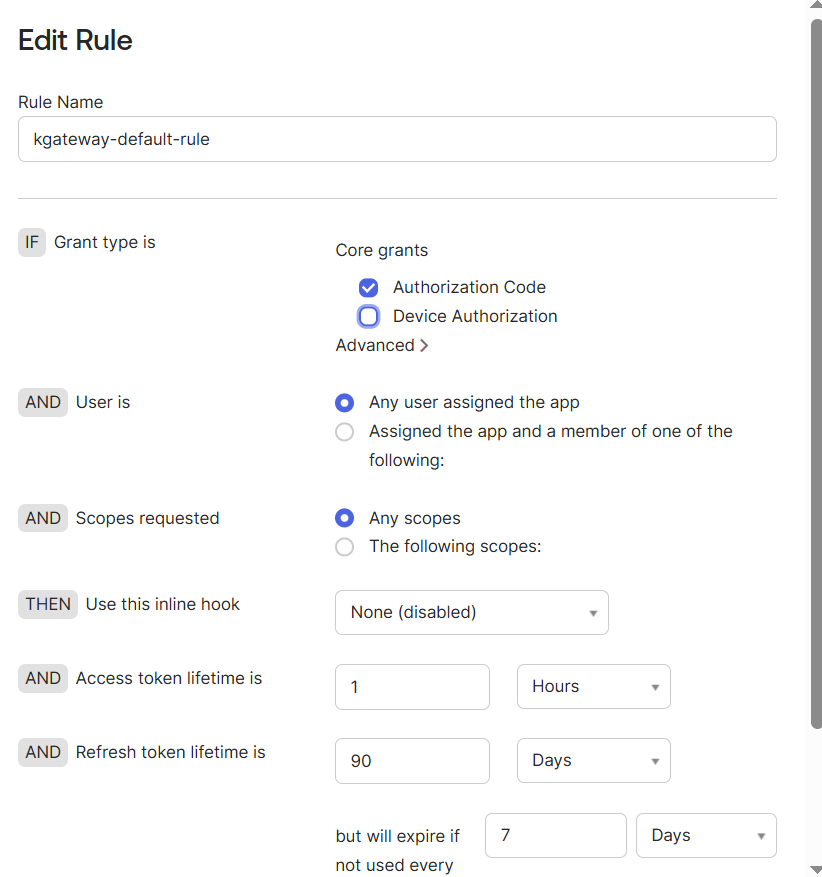
- Rule Name:
After you save the policy and rule, the default authorization server issues tokens for the kgateway-app client, and the issuer, audience, and JWKS endpoints all resolve under /oauth2/default.
Connect kgateway to Okta
Both authentication flows need a network path from the gateway to Okta. Create these two resources before configuring either flow. All URLs in this section and the flow guides resolve under /oauth2/default on your Okta domain.
Create a Backend for Okta
Create a Backend resource to define how kgateway reaches your Okta instance. This Backend uses the Static type, with Okta’s host and port configured.
kubectl apply -f- <<EOF
apiVersion: gateway.kgateway.dev/v1alpha1
kind: Backend
metadata:
  name: okta
  namespace: kgateway-system
spec:
  type: Static
  static:
    hosts:
    - host: YOUR_OKTA_DOMAIN
      port: 443
EOF
Replace YOUR_OKTA_DOMAIN with your Okta domain (such as integrator-6003780.okta.com). The port must be 443 because kgateway communicates with Okta over HTTPS.
Note
This address is separate from the public Okta URL that you configure on the GatewayExtension. The Backend provides the network path for token exchange and OIDC discovery. The browser does not need to reach it.
Configure TLS for the Okta Backend
Okta uses a certificate from a public, trusted CA, so you can use the system’s trusted CA certificates. Create a BackendConfigPolicy to configure TLS.
kubectl apply -f- <<EOF
apiVersion: gateway.kgateway.dev/v1alpha1
kind: BackendConfigPolicy
metadata:
  name: okta-tls
  namespace: kgateway-system
spec:
  targetRefs:
    - group: gateway.kgateway.dev
      kind: Backend
      name: okta
  tls:
    sni: YOUR_OKTA_DOMAIN
    wellKnownCACertificates: System
EOF
Replace YOUR_OKTA_DOMAIN with your Okta domain, such as integrator-6003780.okta.com. The wellKnownCACertificates: System setting tells Envoy to use the system’s trusted CA certificates.
Next steps
Okta is configured and the gateway can reach it. Now protect a route with the flow that matches how your clients arrive.
Cleanup
You can remove the resources that you created in this guide.-
Remove the resources from this page only after you have cleaned up whichever flow you configured.
kubectl delete BackendConfigPolicy okta-tls -n kgateway-system kubectl delete Backend okta -n kgateway-system -
To remove Okta, delete the Okta application from your Okta Admin Console.