For the complete documentation index, see llms.txt. Markdown versions of all docs pages are available by appending .md to any docs URL.
Keycloak setup
Deploy Keycloak, register kgateway as an OAuth2 client, and give the gateway a network path to reach it.
Set up a Keycloak instance, register kgateway as an OAuth2 client, and give the gateway a network path to reach Keycloak. Every Keycloak guide in this section starts here.
When you finish, you choose an authentication flow:
- Authorization code flow for browser traffic.
- Access token validation for API clients that already hold a token.
Before you begin
-
Follow the Get started guide to install kgateway.
-
Follow the Sample app guide to create a gateway proxy with an HTTP listener and deploy the httpbin sample app.
-
Get the external address of the gateway and save it in an environment variable.
export INGRESS_GW_ADDRESS=$(kubectl get svc -n kgateway-system http -o jsonpath="{.status.loadBalancer.ingress[0]['hostname','ip']}")
echo $INGRESS_GW_ADDRESS
If you plan to use the authorization code flow, that guide also requires an HTTPS listener on your gateway. Nothing on this page depends on it.
Install Keycloak
Deploy a Keycloak instance to test this guide against. The following steps create one from a single manifest, with the admin credentials admin/admin and a self-signed certificate for HTTPS.
Important
These steps are for testing this guide only. Running Keycloak in production involves decisions that are outside the scope of kgateway’s documentation, such as an external database, clustering, and certificates from a CA that your gateway trusts. For that, use the Keycloak Operator and follow Configuring Keycloak for production. The steps below are not a production install.
-
Create the
keycloaknamespace.kubectl create namespace keycloak -
Generate a self-signed certificate for Keycloak and store it in a Secret.
openssl req -x509 -newkey rsa:4096 -keyout tls.key -out tls.crt -days 365 -nodes -subj "/CN=keycloak.keycloak.svc.cluster.local" kubectl create secret tls keycloak-tls -n keycloak --cert=tls.crt --key=tls.key -
Deploy Keycloak.
kubectl apply -f- <<EOF apiVersion: v1 kind: Service metadata: name: keycloak namespace: keycloak spec: selector: app: keycloak ports: - name: https port: 8443 targetPort: 8443 --- apiVersion: apps/v1 kind: Deployment metadata: name: keycloak namespace: keycloak spec: replicas: 1 selector: matchLabels: app: keycloak template: metadata: labels: app: keycloak spec: containers: - name: keycloak image: quay.io/keycloak/keycloak:26.7.3 args: ["start-dev", "--https-port=8443"] env: - name: KC_BOOTSTRAP_ADMIN_USERNAME value: "admin" - name: KC_BOOTSTRAP_ADMIN_PASSWORD value: "admin" - name: KC_HTTPS_CERTIFICATE_FILE value: /opt/keycloak/conf/tls.crt - name: KC_HTTPS_CERTIFICATE_KEY_FILE value: /opt/keycloak/conf/tls.key ports: - name: https containerPort: 8443 volumeMounts: - name: keycloak-tls mountPath: /opt/keycloak/conf volumes: - name: keycloak-tls secret: secretName: keycloak-tls EOF -
Wait for Keycloak to be ready.
kubectl rollout status deployment/keycloak -n keycloak
Alternative: ConfigMap-based setup
Instead of manually configuring Keycloak through the admin console, you can define the realm, client, and user declaratively in a ConfigMap. Keycloak imports the configuration on startup, which is more repeatable and GitOps‑friendly.
Note
This approach is useful for repeatable and GitOps‑friendly setups. For learning and debugging, the manual UI setup is still available.
1. Create the ConfigMap
Apply the following ConfigMap that defines the realm, client, and test user:
kubectl apply -f- <<EOF
apiVersion: v1
kind: ConfigMap
metadata:
  name: keycloak-kgateway-realm
  namespace: keycloak
data:
  myrealm.json: |
    {
      "realm": "myrealm",
      "enabled": true,
      "displayName": "myrealm",
      "clients": [
        {
          "clientId": "kgateway-client",
          "secret": "kgateway-client-secret",
          "enabled": true,
          "publicClient": false,
          "standardFlowEnabled": true,
          "directAccessGrantsEnabled": true,
          "redirectUris": [
            "https://www.example.com/oauth2/redirect",
            "http://localhost:8080/oauth2/redirect"
          ],
          "webOrigins": [],
          "protocolMappers": [
            {
              "name": "kgateway-audience",
              "protocol": "openid-connect",
              "protocolMapper": "oidc-audience-mapper",
              "config": {
                "included.client.audience": "kgateway-client",
                "id.token.claim": "false",
                "access.token.claim": "true"
              }
            }
          ]
        }
      ],
      "users": [
        {
          "username": "testuser",
          "enabled": true,
          "email": "[email protected]",
          "firstName": "Test",
          "lastName": "User",
          "credentials": [
            {
              "type": "password",
              "value": "password",
              "temporary": false
            }
          ]
        }
      ]
    }
EOF
2. Update the Keycloak Deployment
If you already applied the deployment from the Install Keycloak section, update it to mount the ConfigMap and import the realm on startup. Add the --import-realm flag to the args and the volume mounts for the ConfigMap.
Apply the following YAML (this replaces the existing deployment with the required additions):
kubectl apply -f- <<EOF
apiVersion: apps/v1
kind: Deployment
metadata:
  name: keycloak
  namespace: keycloak
spec:
  replicas: 1
  selector:
    matchLabels:
      app: keycloak
  template:
    metadata:
      labels:
        app: keycloak
    spec:
      containers:
      - name: keycloak
        image: quay.io/keycloak/keycloak:26.7.3
        args: ["start-dev", "--import-realm", "--https-port=8443"]
        env:
        - name: KC_BOOTSTRAP_ADMIN_USERNAME
          value: "admin"
        - name: KC_BOOTSTRAP_ADMIN_PASSWORD
          value: "admin"
        - name: KC_HTTPS_CERTIFICATE_FILE
          value: /opt/keycloak/conf/tls.crt
        - name: KC_HTTPS_CERTIFICATE_KEY_FILE
          value: /opt/keycloak/conf/tls.key
        ports:
        - name: https
          containerPort: 8443
        volumeMounts:
        - name: keycloak-tls
          mountPath: /opt/keycloak/conf
        - name: realm-config
          mountPath: /opt/keycloak/data/import
      volumes:
      - name: keycloak-tls
        secret:
          secretName: keycloak-tls
      - name: realm-config
        configMap:
          name: keycloak-kgateway-realm
EOF
Note
This ConfigMap approach automates the realm, client, and user configuration. You still need to configure the Backend and TLS BackendConfigPolicy as described in the next section. The Backend still points to Keycloak on port 8443 with insecureSkipVerify: true.
3. Verify the realm was imported
Check the Keycloak logs for the import message:
kubectl logs deployment/keycloak -n keycloak | grep -i importYou should see output similar to:
Realm 'myrealm' imported
Import finished successfully
Then, port‑forward Keycloak and verify the realm appears in the admin console:
kubectl port-forward svc/keycloak -n keycloak 8443:8443Open https://localhost:8443 in your browser, accept the self‑signed certificate warning, and log in with admin / admin. Click Manage realms in the left sidebar, and confirm that myrealm is listed.
Note
If you’re using the ConfigMap approach, the realm is created automatically on startup. You do not need to manually create it through the admin console.
4. Test the authentication flows
Follow the verification steps in the Authorization code flow and Access token validation guides to confirm both flows work with the ConfigMap setup.
Configure Keycloak
Create a realm, register kgateway as a confidential client, and add a test user. You return to the admin console values that you collect here, such as the client secret, when you create the kgateway resources.
Access the Keycloak admin console
-
Port-forward to the Keycloak service.
kubectl port-forward svc/keycloak -n keycloak 8443:8443 -
Open
https://localhost:8443in your browser. Because Keycloak uses a self-signed certificate, accept the browser warning. -
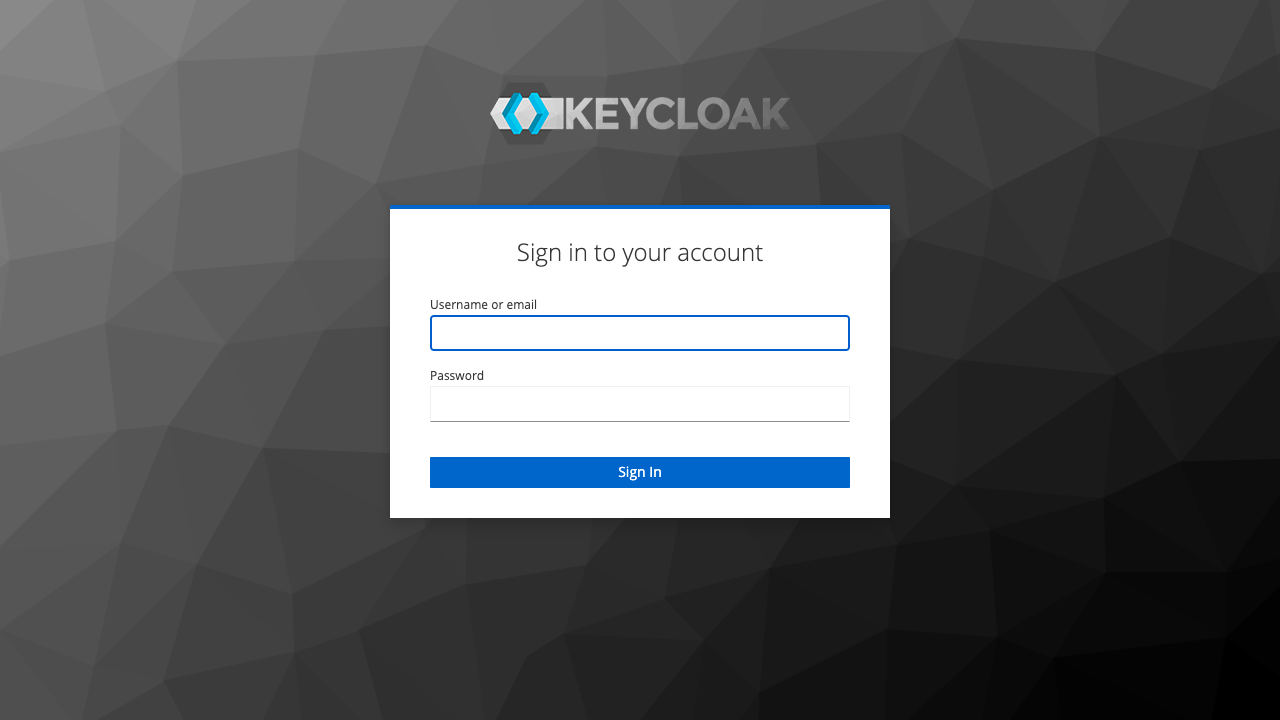
Log in with username
adminand passwordadmin.
Note
The account that KC_BOOTSTRAP_ADMIN_USERNAME creates is a temporary admin, so every console page shows a banner that asks you to create a permanent admin account. That banner is expected here, and none of the steps in this guide depend on replacing the account. Create a permanent account and delete the temporary one before you use this Keycloak instance for anything beyond testing.
Create a new realm
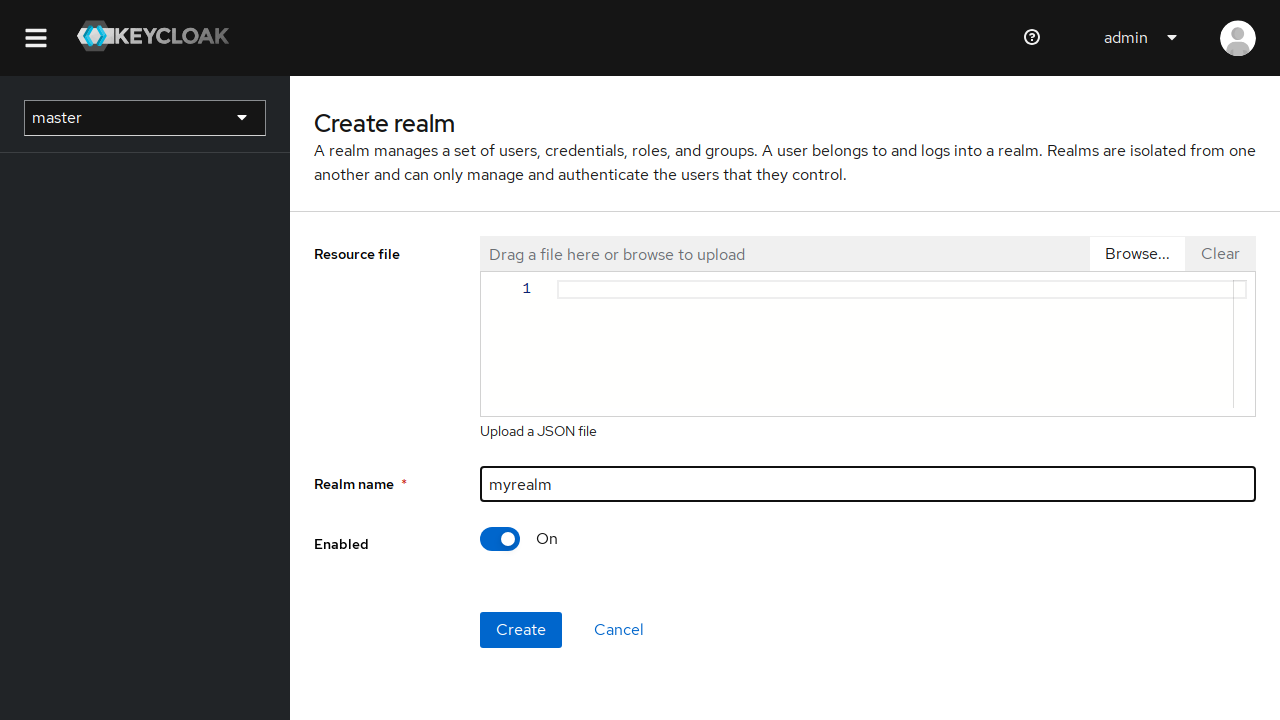
- Click Manage realms in the left sidebar.
- Click Create realm.
- In Realm name, enter a realm name, such as
myrealm. - Click Create.
Create a client
The Create client wizard has three pages, and the settings that these guides need are spread across all three. The page numbers appear down the left side of the wizard.
-
Click Clients in the left sidebar.
-
Click Create client.
-
On the General settings page, set Client ID to
kgateway-client.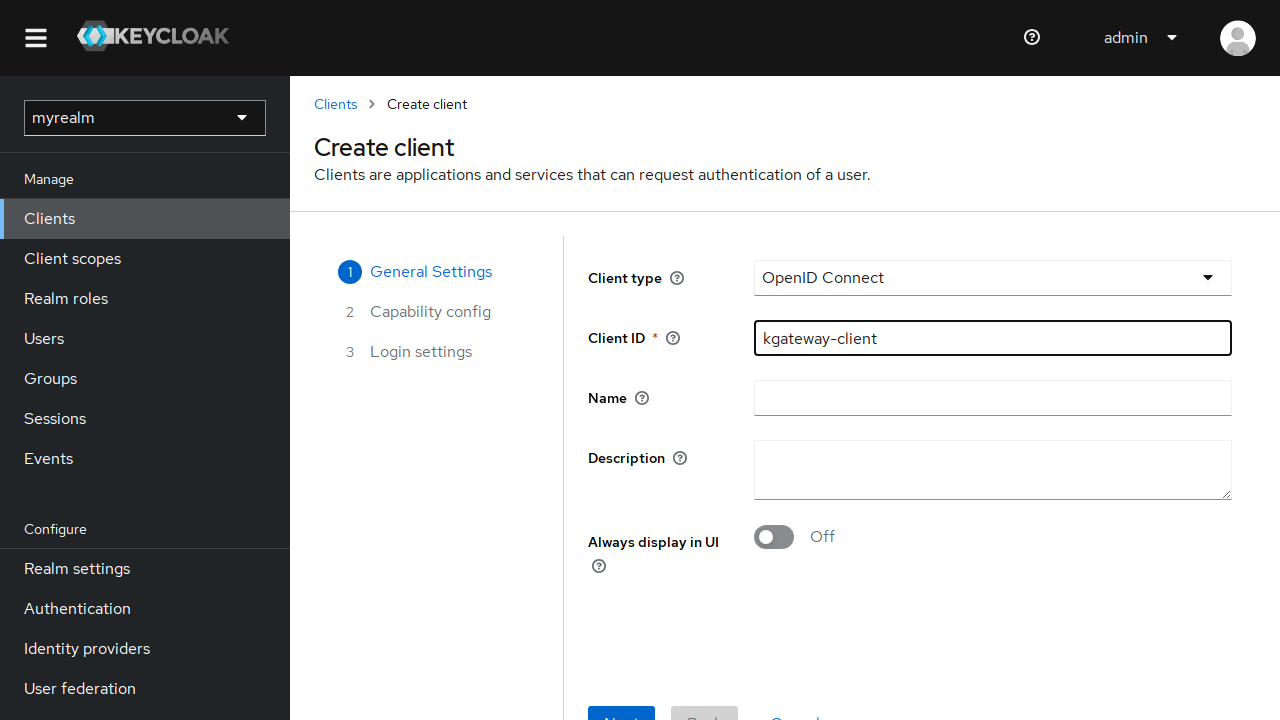
-
Click Next.
-
On the Capability config page, turn Client authentication on. This makes the client confidential, which is what gives it the client secret that you copy in a later section.
Then make sure that both of the following authentication flows are selected.
- Standard flow issues authorization codes, which the authorization code flow requires. Keycloak selects this flow by default.
- Direct access grants enables the
passwordgrant, which the access token validation guide uses to fetch a token for testing. Keycloak clears this flow by default, so select it yourself.
Important
If you leave Direct access grants cleared, the client is still created without complaint, and the token request in the access token validation guide fails later with
unauthorized_client.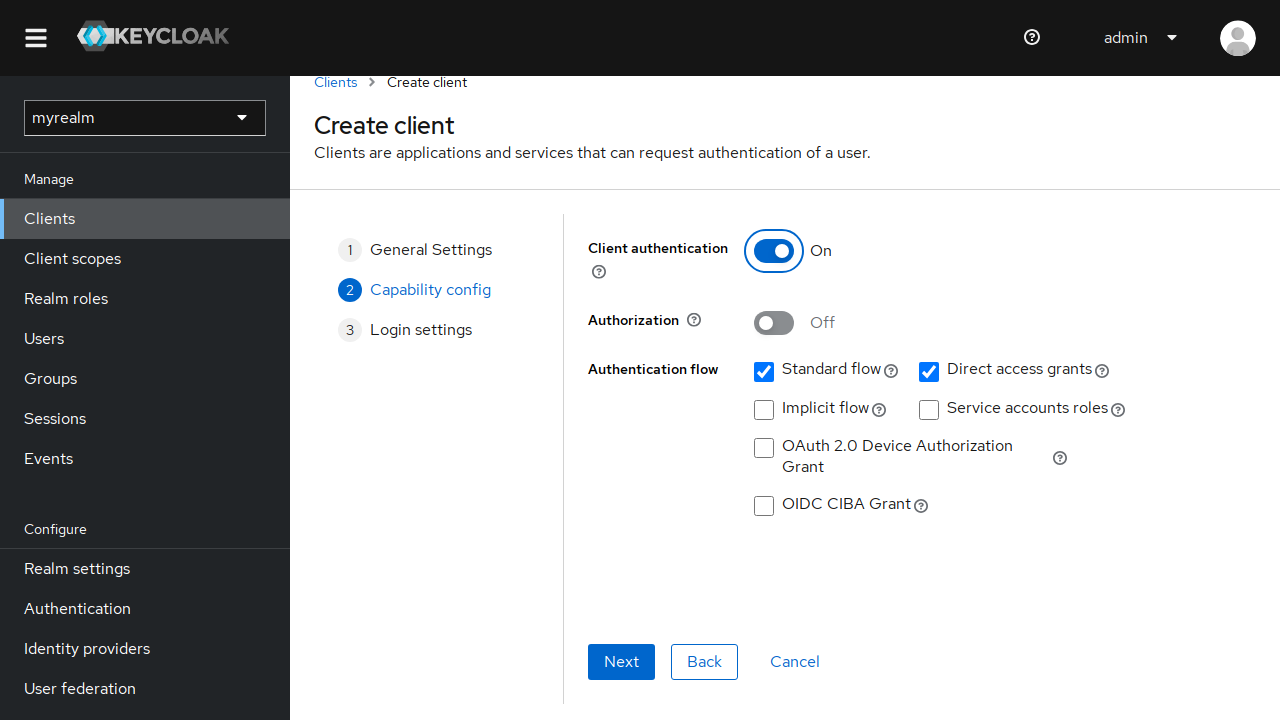
-
Click Next to reach the Login settings page, then follow the next section to fill it in.
Configure redirect URIs
Keycloak rejects the login request with Invalid parameter: redirect_uri unless the value that kgateway sends is registered on the client. You set that value explicitly in the redirectURI field of the GatewayExtension in the authorization code flow guide, so register the identical string here.
-
On the Login settings page, in Valid redirect URIs, add the callback URL for your gateway, where the host is the hostname that the browser uses to reach your route.
https://www.example.com/oauth2/redirect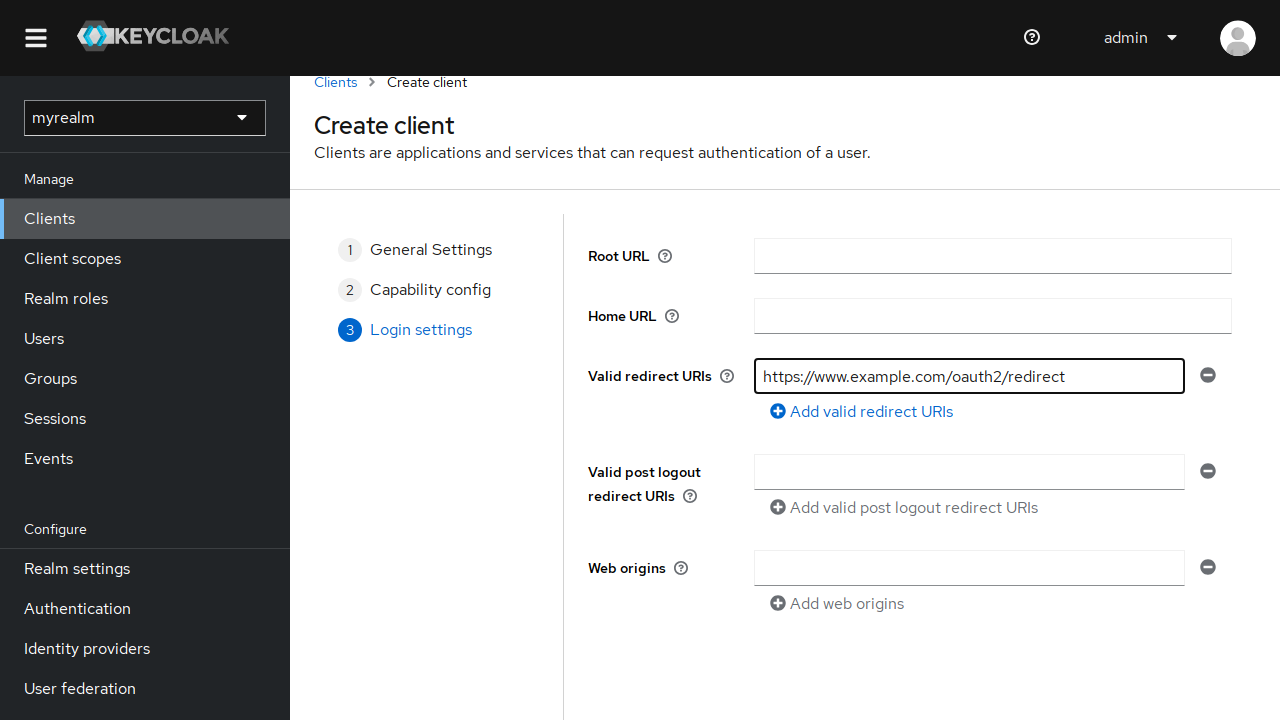
-
Click Save. This finishes the wizard and creates the client.
Warning
Do not register a wildcard redirect URI such as https://www.example.com/*. A wildcard lets an attacker who can influence the redirect_uri parameter send the authorization code to a path that you do not control. Register the exact callback path instead.
Note the client secret
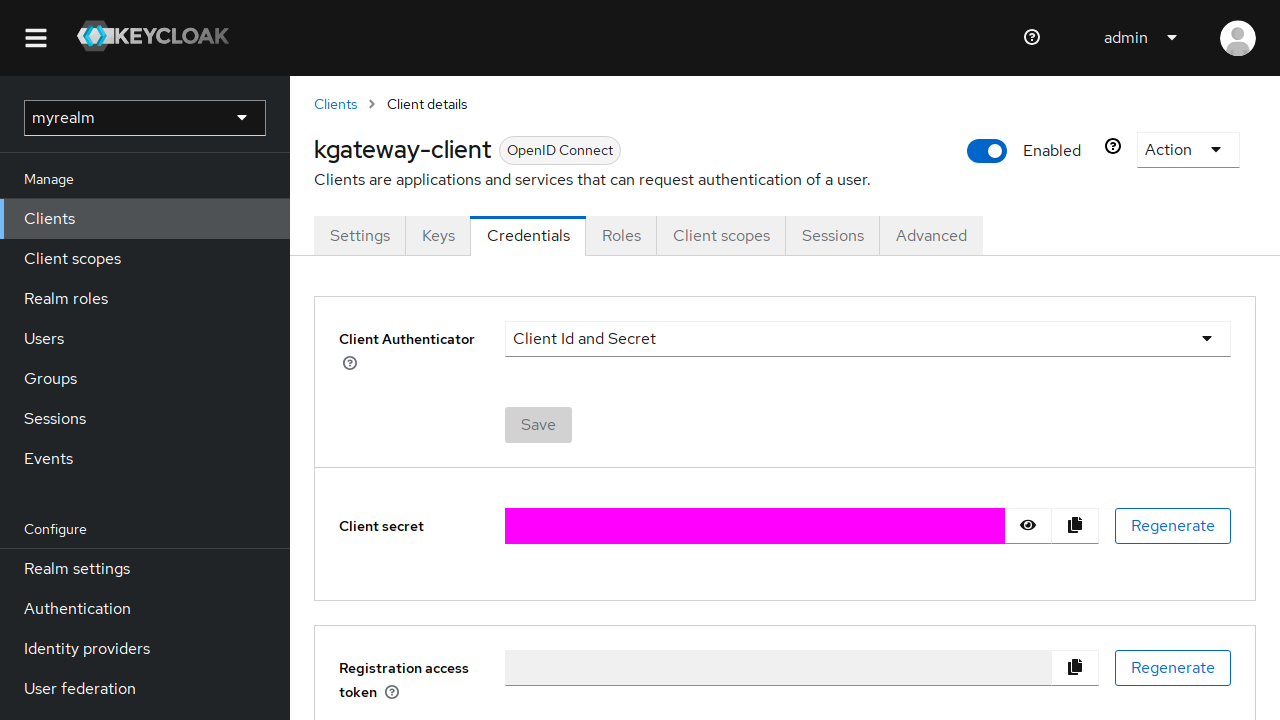
- Go to the Credentials tab of your client.
- Copy the Client secret — you need it for the
oauth2-client-secretin the next section.
Create a test user
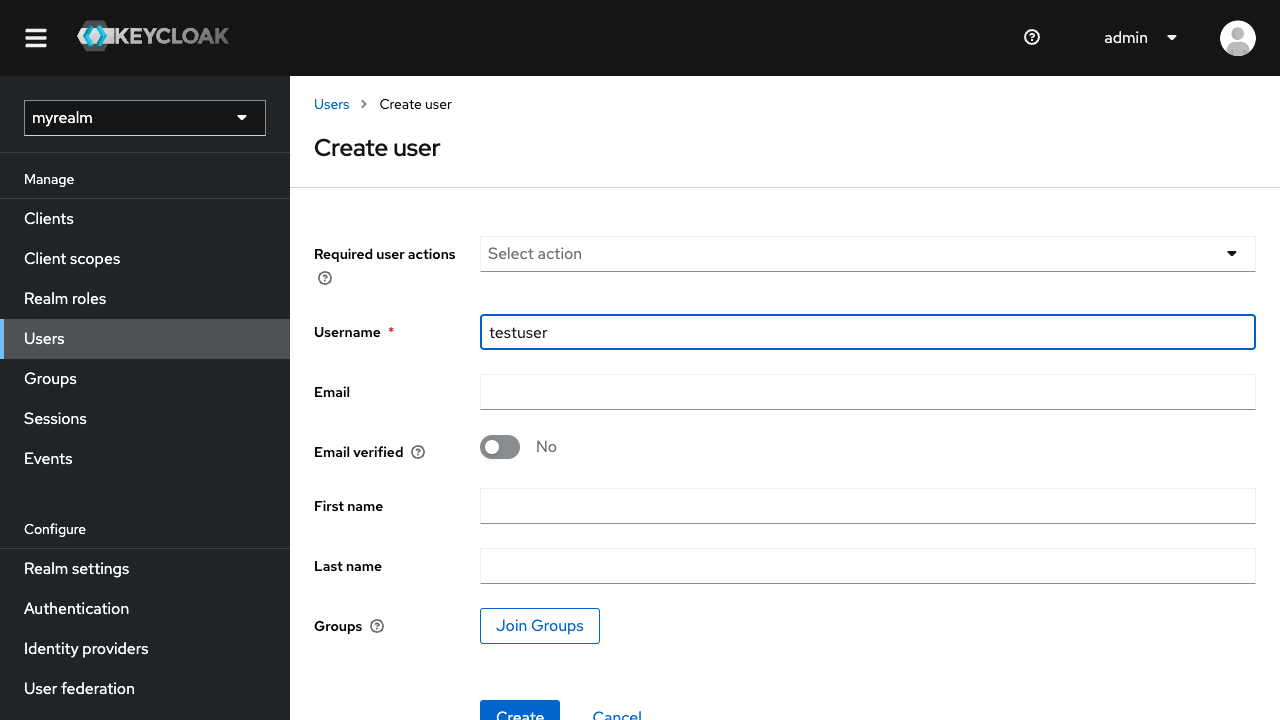
- Click Users in the left sidebar.
- Click Add user.
- Set Username (such as,
testuser). - Click Create.
Set a password for the test user
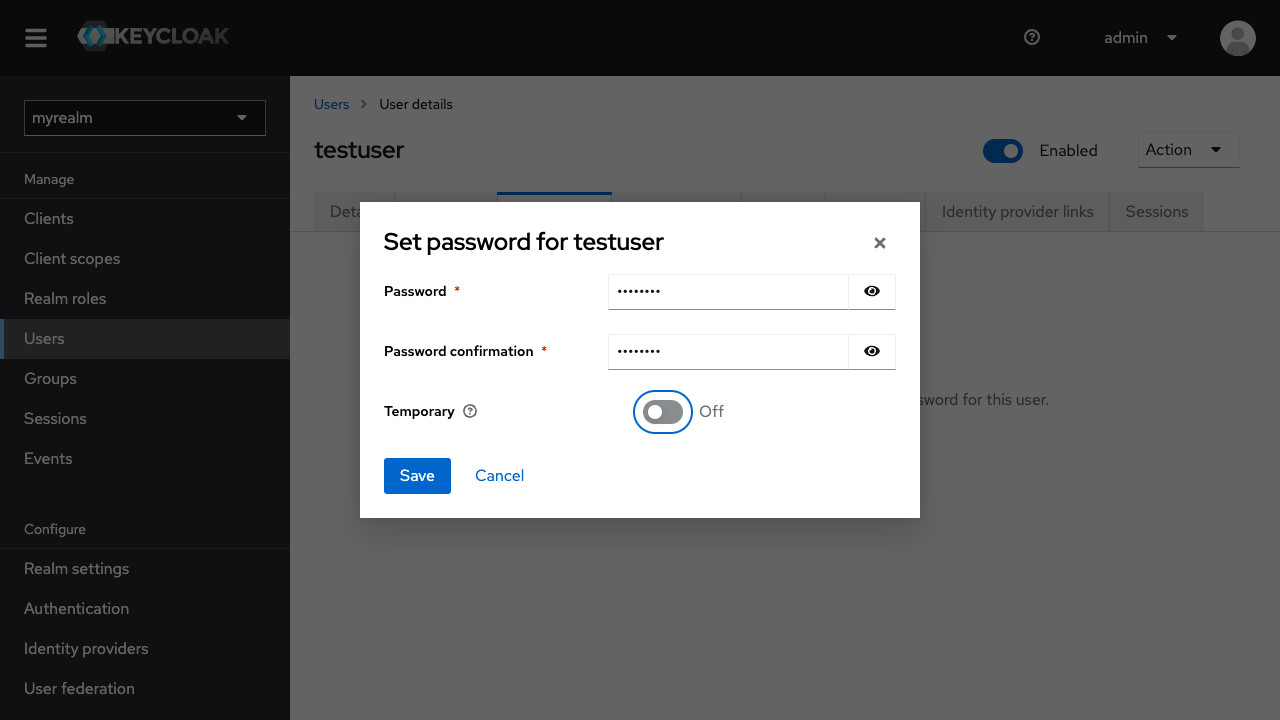
- Go to the Credentials tab.
- Click Set password.
- Enter a password, such as
password, in both Password and Password confirmation. - Turn Temporary off.
- Click Save, then click Save password to confirm.
Add an audience mapper
Complete this step only if you plan to use the access token validation flow.
By default, Keycloak does not put your client ID in the aud claim of an access token. A token that is issued to kgateway-client carries "aud": "account", which is the realm’s built-in account client. Passing an audience parameter to the token endpoint does not change this, because Keycloak derives the audience from the client’s protocol mappers rather than from the request.
Add an audience mapper so that tokens carry your client ID, which lets the JWT policy restrict access to this client.
- Open your client and go to the Client scopes tab.
- Click the dedicated scope for your client, which is named
kgateway-client-dedicated. - Click Add mapper > By configuration > Audience.
- Set Name to
kgateway-audience. - Set Included Client Audience to
kgateway-client. - Verify that Add to access token is on.
- Click Save.
Tokens for this client now include "aud": ["kgateway-client", "account"].
Note
The steps above create the myrealm realm for testing only. For production, use a dedicated Keycloak instance with a certificate from a CA that the gateway trusts, and a realm that your organization manages.
Connect kgateway to Keycloak
Both authentication flows need a network path from the gateway to Keycloak. Create these two resources first, whichever flow you use.
Create a Backend for Keycloak
Create a Backend resource that defines how kgateway reaches your Keycloak instance. This Backend uses the Static type with the host and port configured for Keycloak.
kubectl apply -f- <<EOF
apiVersion: gateway.kgateway.dev/v1alpha1
kind: Backend
metadata:
  name: keycloak
  namespace: kgateway-system
spec:
  type: Static
  static:
    hosts:
    - host: keycloak.keycloak.svc.cluster.local
      port: 8443
EOF
Set host and port to the address and port that kgateway uses to reach Keycloak from inside the cluster. The example values match the Service that you created in Install Keycloak, which listens on port 8443. If you deployed Keycloak another way, check the port on its Service.
kubectl get svc keycloak -n keycloakNote
This address is separate from the public Keycloak URL that you configure on the GatewayExtension in the next steps. The Backend is the network path that the gateway uses for token exchange and OIDC discovery, and it does not have to be reachable from the browser.
Configure TLS for the Keycloak Backend
The Keycloak instance in this guide serves HTTPS with a self-signed certificate, which the gateway does not trust. Create a BackendConfigPolicy that skips TLS verification for the Keycloak Backend.
Warning
insecureSkipVerify disables certificate verification for traffic to Keycloak, which means the gateway cannot detect a man-in-the-middle on that connection. Use it only with the self-signed test instance. For production, give Keycloak a certificate from a CA that the gateway trusts.
kubectl apply -f- <<EOF
apiVersion: gateway.kgateway.dev/v1alpha1
kind: BackendConfigPolicy
metadata:
  name: keycloak-tls
  namespace: kgateway-system
spec:
  targetRefs:
    - group: gateway.kgateway.dev
      kind: Backend
      name: keycloak
  tls:
    insecureSkipVerify: true
EOF
Next steps
Keycloak is configured and the gateway can reach it. Now protect a route with the flow that matches how your clients arrive.
Cleanup
You can remove the resources that you created in this guide.-
Remove the resources from this page only after you have cleaned up whichever flow you configured.
kubectl delete BackendConfigPolicy keycloak-tls -n kgateway-system kubectl delete Backend keycloak -n kgateway-system -
To remove Keycloak, delete its namespace.
kubectl delete namespace keycloak